[ See part 1 of this article ]
Before we get into the nitty-gritty of climbing, let’s go over what options you have for tools. There are leashed and leash-less tools. Leashed tools have straps that go around you wrist. The leashes help take some of your body weight off your hands and distributes it on your wrists. A few problems that you may face when climbing with leashes are cold hands from the leash cutting blood flow, difficulty placing screws and you really can’t match or switch hands.
Climbing leash-less allows for a full range of movement and allows for a more “free” style of climbing. Just make sure not to drop them because they aren’t attached to you, but on multi-pitch climbs you can attach them to you or your harness via cottontails. Cottontails are long pieces of cord that you attach to your person so if you drop them they don’t fall to the ground.
Now it’s time to climb! Before you go swinging your razor sharp tools and crampons into that virgin ice, make sure your hands and feet are nice and warm because if you leave the ground with cold hands, the chance the screaming barfies will catch up with you. Once your extremities are warm, it’s time to start climbing. Just like rock climbing, over-gripping and foot work (or lack there of) can affect your performance on the climb. Learn how to take rests and shake out your hands…a major advantage to climbing leash-less. Placing the tool over a shoulder, clipping it to your harness, the pirate, or having a solid hook or stick in the ice can allow for these arm rests. When you are rock climbing, look where you place your feet. This technique transfers over to ice and mixed climbing as well. Don’t just bash or scratch your way up the climb. On ice, look where you kick your feet and make sure your heals are down. If you don’t take anything else away from this post, just remember to keep your heals down.
Mixed climbing has a few similarities to ice but dry tooling is a different animal all together. When you get to that rock section of the climb, its time to hook. Dry tooling allows the climber to be as creative as you want; side pull hooks, dynos, caming the tool, and anything else you can dream of. Remember to keep constant angle and pressure with the tool otherwise it will poop (slip) off of that tiny edge that took you so much work to get to. DO NOT look at the tool when you move on unless you enjoy the hammer end of the tool smacking your dome! (It always finds a way to get between your glasses and helmet) Just like ice, keep your heals down, place your crampons on holds and keep your feet still keeping the angle constant because the crampons will poop off the holds.
Now it’s time for the hike out. Ahh yes, the day is over. It’s dark, you’re tired and all you can think about is making it to the pub for a nice hot plate of food and some cold pints to reminisce your day and plan your next adventure.
Stop. Don’t get to far ahead of yourself. You still have some mindful work to do. Focus on getting down to your car safely. The trails are steep and can be very slick, so just take your time, enjoy the quiet, keep warm and get down safely. No matter the conditions, get out there. Climb and have fun!
Mike Caputo
Here are some great products to check out for you next mixed-ice climbing adventure.
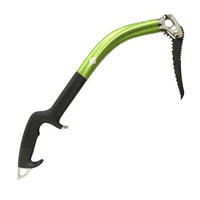
The Black Diamond Fusion Ice Tool

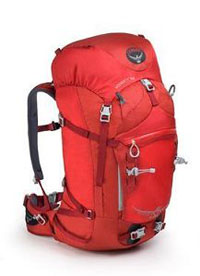
Osprey Packs Variant 52


